With great power comes great responsibility—or, in this case, great storage needs. It's not uncommon for gamers to need more storage space to match their console’s capabilities. With some expert help, you can increase the internal storage on your PlayStation 5® and stop worrying about having enough space to fully experience Sony® Spider-Man 2.
At uBreakiFix® by Asurion, we're all about helping you get the most out of your tech. From gaming console repairs to sharing ways to solve lagging issues on your PlayStation—we’ve got you covered. Here’s how to get more storage space on your PS5®.
How much storage does your PS5 have?
The PS5 has two models—the disc drive-less Digital Edition and the version that has the Ultra HD Blu-ray disc drive. Both come with 825GB of SSD (Solid State Drive) space. That number drops after accounting for the system software. While this might seem like more than enough space, the size of modern games can use this up faster than you might expect.
Internal storage vs digital storage
Understanding the difference between the PS5's internal and digital storage is key to effectively managing your console’s space.
Internal storage
Internal storage on a PlayStation 5 refers to the built-in storage capacity that comes with the console itself, built-in by the manufacturer. The PS5 utilizes a high-speed Solid-State Drive (SSD) as its internal storage, significantly enhancing loading times and overall system performance. The internal storage capacity of a PS5 is limited to what your system had when you bought it.
Digital storage
Digital storage refers to devices you can connect to your PS5 to store more games and data, like external hard drives or SSDs.

It’s not game over—yet
If your console stops working, we’ll handle the repairs. Make an appointment, or visit your nearest store today.
How to get more storage on PS5
Running out of space? Here are some ways to expand your PS5 storage.
Use an external USB hard drive or SSD
To expand storage, you can connect an external USB hard drive or SSD to your PS5. While you can't directly run PS5 games from external storage, you can use it to store and manage your compatible PS4 games, media files, and applications. This frees up space on your internal SSD for PS5 games.
Manage your game library
Regularly review and delete games you no longer play. Remember, you can always re-download them later from your purchase history.
Take advantage of cloud storage
PlayStation Plus subscribers get access to cloud storage, where you can save your game data. This won't directly expand your storage for game installations, but it's useful for safeguarding your progress.
Use the M.2 SSD Expansion Slot
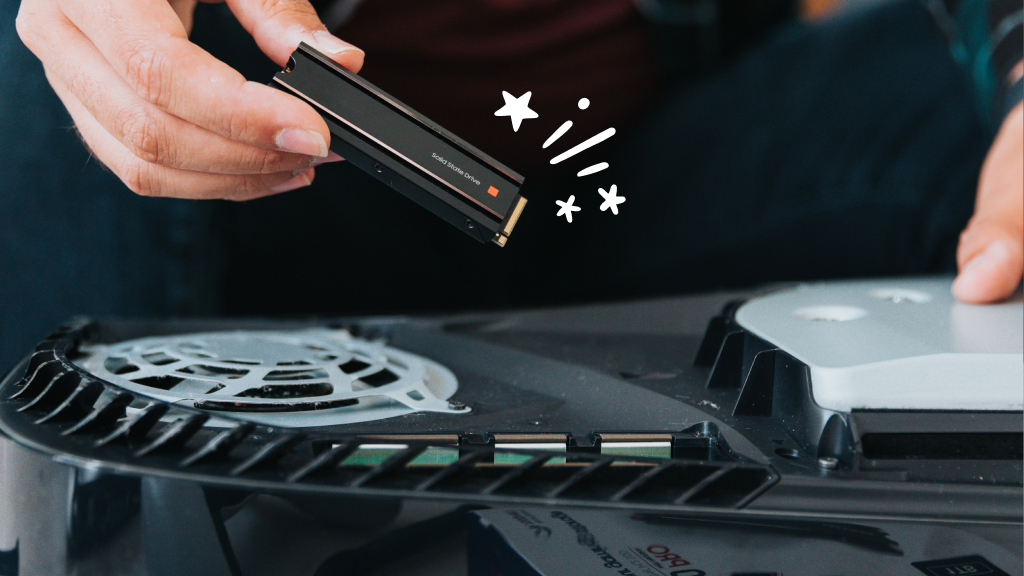
The PS5 has an M.2 SSD expansion slot that allows you to add a compatible NVMe SSD for additional storage. Ensure the SSD meets the PS5's size, speed, and form factor requirements. You can find a list of compatible SSDs in the PS5 system software.
Upgrade your internal hard drive
For those who are tech-savvy, upgrading the internal SSD of your PS5 is an option. Upgrading your internal storage involves purchasing a compatible PS5 SSD and physically replacing the current one. Remember that this upgrade can void your warranty, so we suggest leaving it to a PlayStation 5 repair expert. If you attempt to go it alone, here are the tools you’ll need and the steps you should follow.
How to upgrade your PS5 hard drive
Your PlayStation needs a specific type of SSD—specifically, a PCIe 4.0 M.2 SSD with a heatsink. When shopping for a new drive, choose one with the highest capacity speed and storage to avoid upgrading your storage again. In addition to a compatible SSD, you'll also need a #1 Phillips head screwdriver handy.
Again, be aware that some upgrades to your PS5 can void your warranty. If you have any doubts, reach out to a PS5 repair expert for help with hard drive repair and replacement.
Once you have all of the parts and tools on hand, you’re ready to get started.
1. Remove the back cover
You'll need to remove the back cover of your PS5 to access the SSD slot. Power off the console, disconnect the power cable, HDMI, and anything else connected to it. Set your console on a clean, flat surface.
Then, gently tug on the edge with the PlayStation logo and slide the rest of the cover downwards. Rotate your console, pull from the same direction you did on the other side, and slide the back cover off.
2. Remove the expansion slot cover
You’ll see two items protected by white plastic: the fan and the hard drive expansion slot. Trust us—you can tell the two apart and avoid any confusion. Rotate the console so that the SSD slot is closer to you. Using the screwdriver, remove the single screw and set it aside.
3. Remove the screw and SSD spacer
With the expansion slot cover removed, remove the screw and spacer near the end of the SSD housing.
4. Insert the SSD
Slide the SSD into the connector, pushing until you feel it lock into place. Then, work in reverse. Replace the mounting screw and the expansion slot cover. Slide the back cover back into place.
5. Format the SSD
Connect it to power and the HDMI cable. When you turn on your console, you should see a screen that asks you to format the drive. Formatting the drive prepares it for use but will erase anything currently saved. Follow the steps on the screen to complete that process. Once it's formatted, you’re all set.
If you've tried these steps and still need a little help, we're right around the corner. Schedule a repair at the nearest uBreakiFix® by Asurion store and our certified experts can get your device back up and running as soon as the same day.


