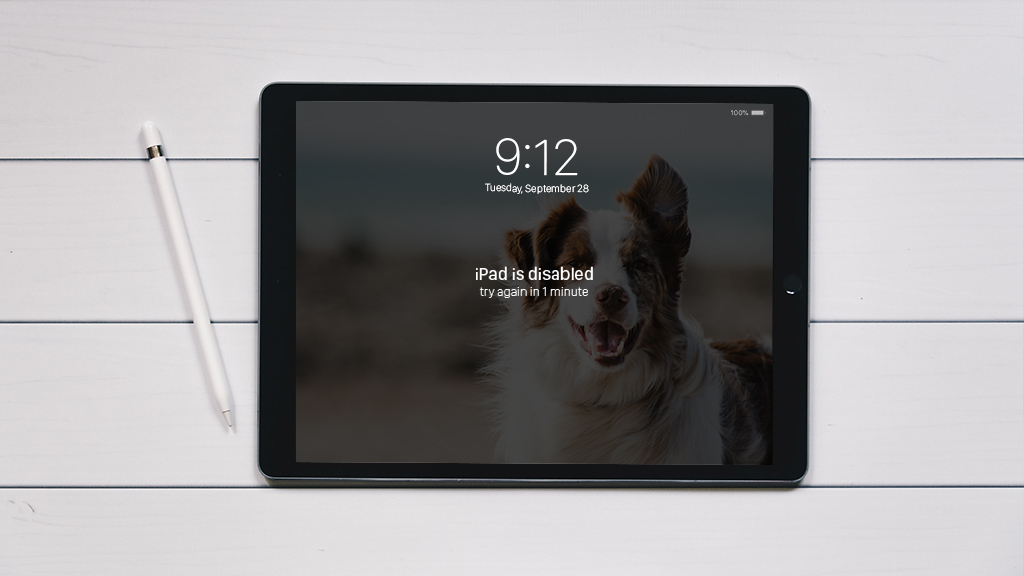
From TV shows and movies to the latest news and our favorite books, our iPad® tablets keep us informed and entertained no matter where we are. But when the screen is disabled, we can miss out on important information—like what happens in the next episode of Ted Lasso.
Don't worry—at Asurion, when tech breaks, we fix it. From faulty touchscreens to outdated software, our experts have your iPad issues covered. Here's their guide to why your iPad is disabled and what you can do to fix it.
Why is my iPad disabled?
If you've entered the wrong passcode too many times, your iPad will disable itself to protect you from hackers or thieves.
But what happens if it was accidentally disabled by a child or friend? Unfortunately, your iPad can't tell the difference—after the 10th attempt, it will auto-lock to block a security breach. Luckily, there are steps you can take to restore or reset it. If your iPad has the dreaded disabled message, here's how to bring it back to life.
How to fix a disabled iPad with iTunes
To use this method, all you'll need is a computer with the iTunes® app and the charging cable that came with your iPad.
1. Put your iPad in recovery mode
This will allow you to bypass the passcode on your screen.
For iPads without a Home button:
- Connect your iPad to your computer.
- Press and hold the Top button and the volume up or down button until the power-off slider appears. Drag the slider to turn off your device.
- Hold down the Top button until the recovery mode screen appears—you should see a black screen with an image of a cable connecting to a computer.
For iPads with a Home button:
- Make sure your iPad is not connected to a computer.
- Press and hold the Top button until the power-off slider appears. Drag the slider to turn off your device.
- Connect your iPad to your computer while holding down the Home button. Keep holding it until you see the recovery mode screen.

Keep your tablet working the way it should
Our experts can help. Schedule a repair or visit your nearest store today.
2. Restore your device
Doing this will erase your iPad, but you can recover your personal files if you've previously synced your device to iTunes.
- Make sure you have the latest version of iTunes.
- On a Mac® running macOS® Catalina or later, open Finder® and select your device under Locations. On a PC or Mac running the Mojave operating system or earlier, click the iPad icon in the upper-left corner of your iTunes window.
- Click Restore from the menu. If this process takes longer than 15 minutes, you'll need to repeat the previous steps to keep your iPad from becoming disabled again.
- Once the restore is complete, you'll see an option to restore your iPad from a backup or set it up as a new device. If you have a backup saved, select this option. If not, proceed to set it up as new.
How to fix a disabled iPad without iTunes
If you're unable to access iTunes, you can also reset your iPad using iCloud®. To do this, you'll need to have previously set up the Find My™ app on your device. NOTE: This will delete all data from your iPad, but you can restore your information if you have an iCloud backup on your iPad.
How to reset your iPad using iCloud
- Go to iCloud.com and sign in with your Apple® ID and password.
- Click on the Find [device] icon and select your iPad from the All Devices list.
- Click Erase iPad, then click Erase again to confirm.
- Once your iPad restarts, enter your Apple ID and password. If you have an iCloud backup saved, you'll have the option to select it. If not, proceed to set up your device as new.
How to prevent your iPad from being disabled in the future
Follow these guidelines to keep your iPad running smoothly:
- Remove your passcode or Face ID® while someone else is using your iPad.
- Use the Guided Access® or Screen Time features to restrict what apps can be used and how long your iPad can be accessed. Check out this video on Asurion's YouTube to learn how to set up Guided Access.
- Turn off the Tap to Wake accessibility setting.
- Manually back up your iPad to iTunes or iCloud once a month.
If you've tried these steps and still need a little help, we're right around the corner. Schedule a repair at the nearest uBreakiFix® by Asurion store and our certified experts can get your device back up and running as soon as the same day.
Protection beyond a tablet warranty
With the Asurion Home+® protection plan, we’ll cover all your favorite home tech—including your tablet, TV, laptop, smart devices and more—plus provide 24/7 live expert support, all in one hassle-free plan. Learn more about an Asurion Home+ tablet warranty and how you can get peace-of-mind electronics protection.


